


Connect your Akeneo PIM to Magento
How to import your Akeneo product information into Magento2?
This post will showcase step by step how one can connect his akeneo server to an magento2 e-commerce backend. The main goal being, of course to synchronize one's catalog from the PIM to ecommerce website. For this we'll use the open source magento module Akeneo_connector previously PIMGento 2 API.
This announcement follows an acquisition by akeneo of the API, as a result, it was renamed
Akeneo Connector for Magento2.
1- Configure your akeneo server
Before being able to synchronize information to Magento, you must ensure that you have correctly configured the Akeneo instance:
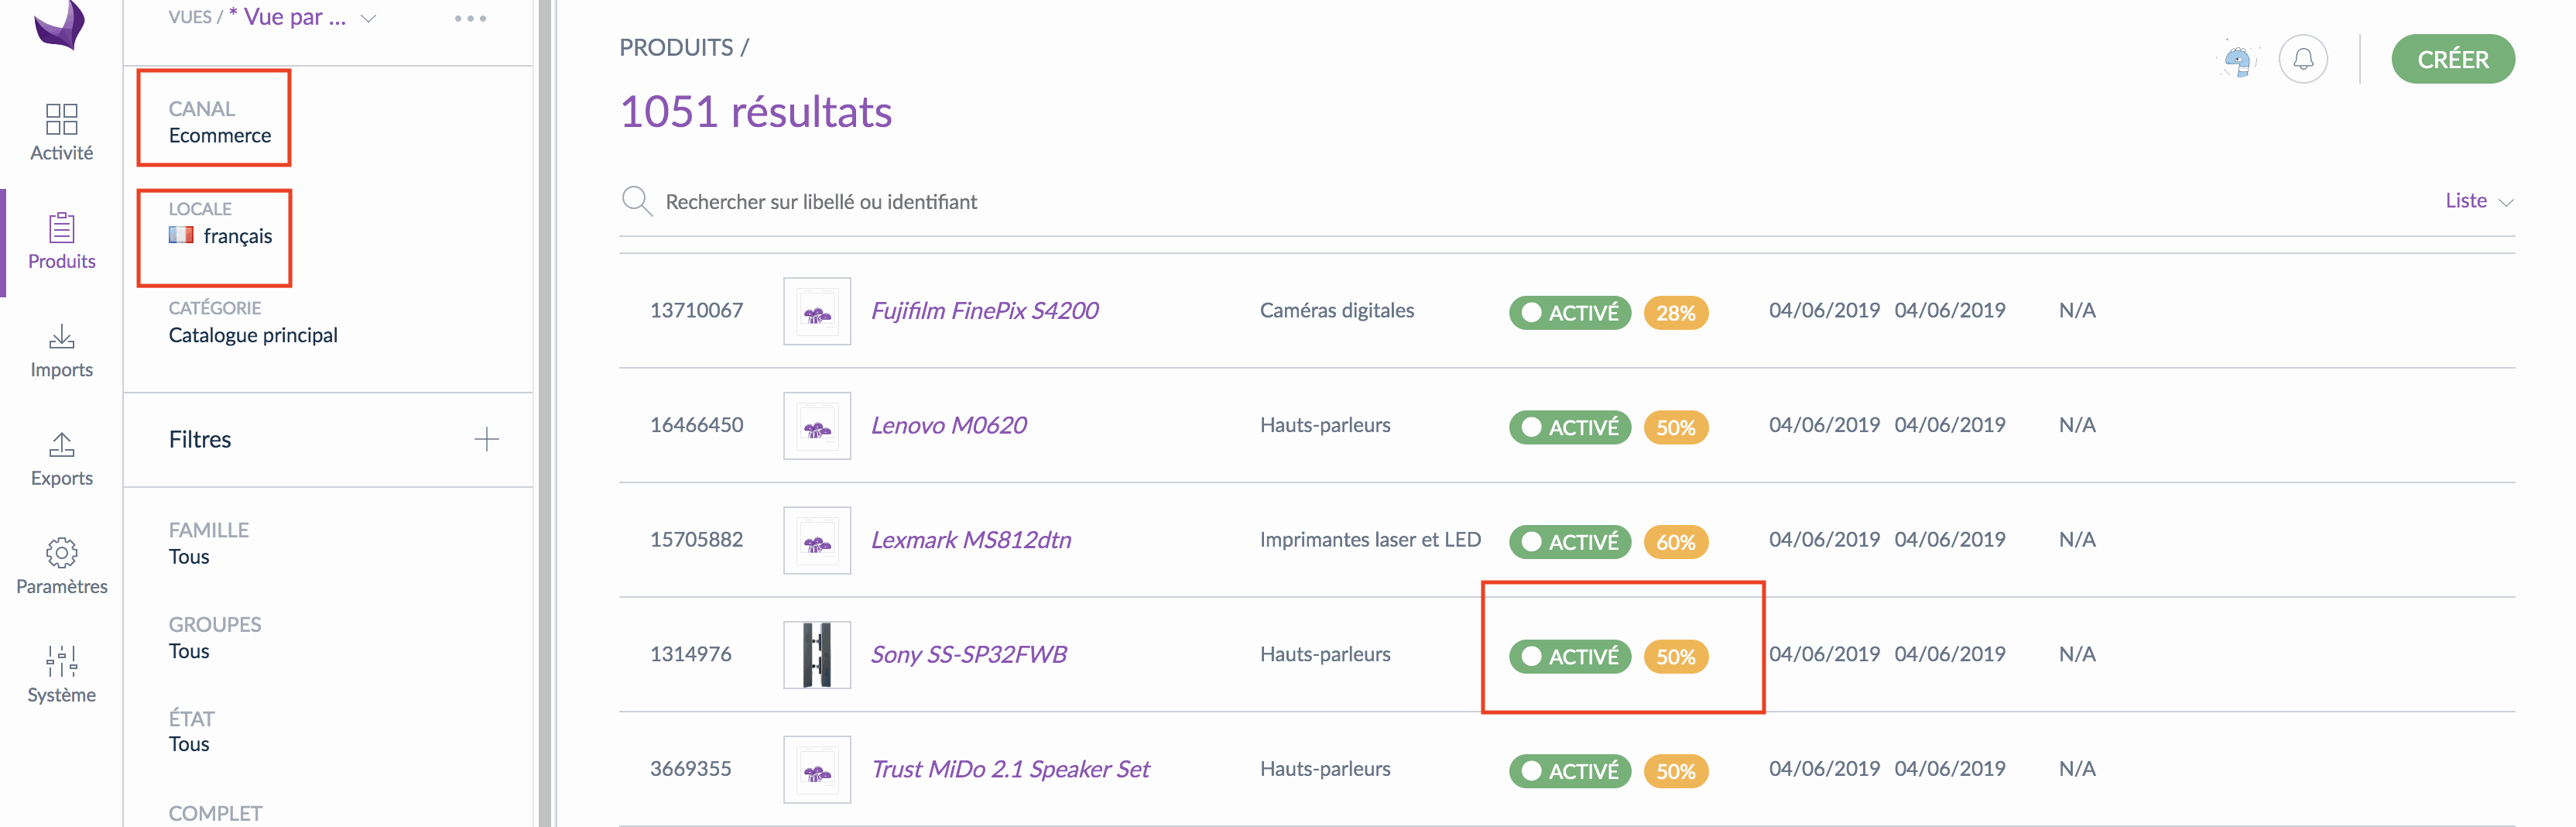
Ensure that the products have been sufficiently filled in (fill in as many fields as possible)
Activate the products you want to synchronize
Check that the activated products are present in the channel you want to synchronize (eg Ecommerce)
Check that the locale (the language) corresponds to the site to which you want to import.
Channel & product verification
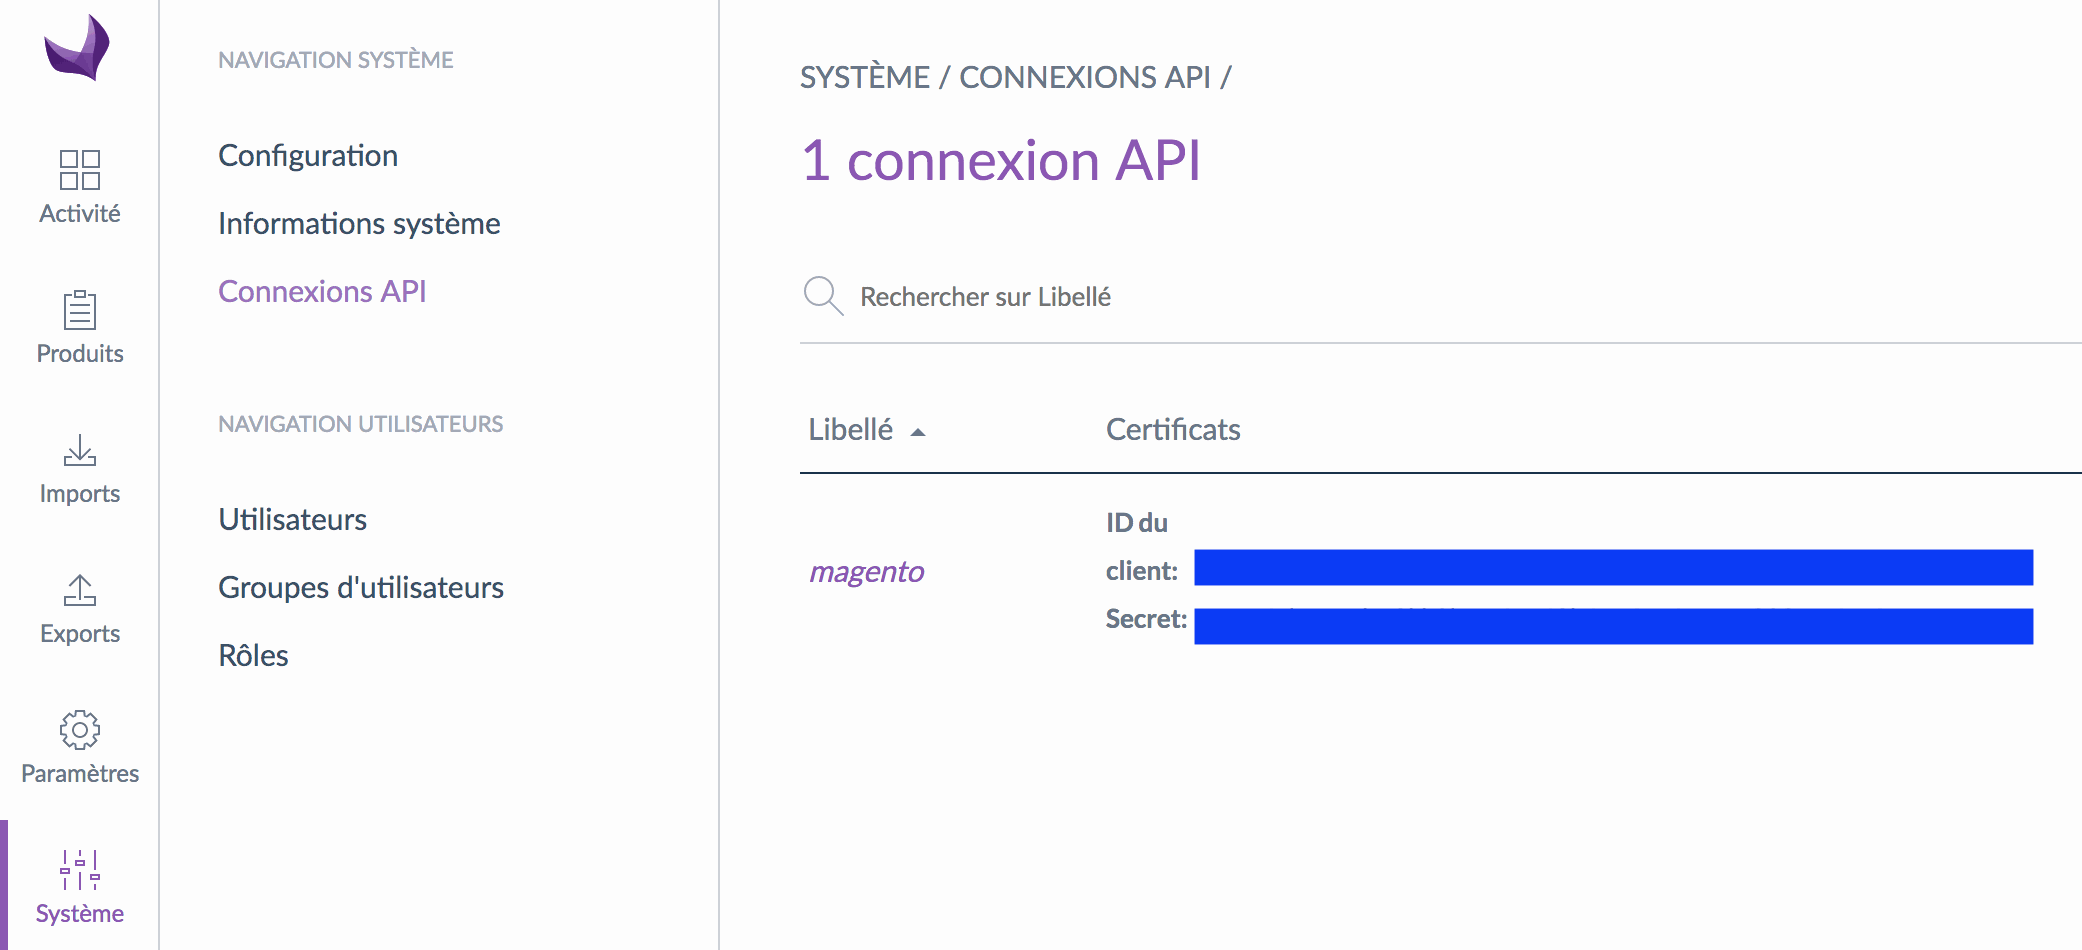
Then, you have to generate the api key that will be used by the Magento server to authenticate with Akeneo.
Akeneo connection api
2- Configure your magento server
Now on the magento side we'll install and configure the akeneo connector
composer require agencednd/module-pimgento-2-api
php bin/magento module:enable Pimgento_Api
php bin/magento setup:upgrade
php bin/magento cache:flush
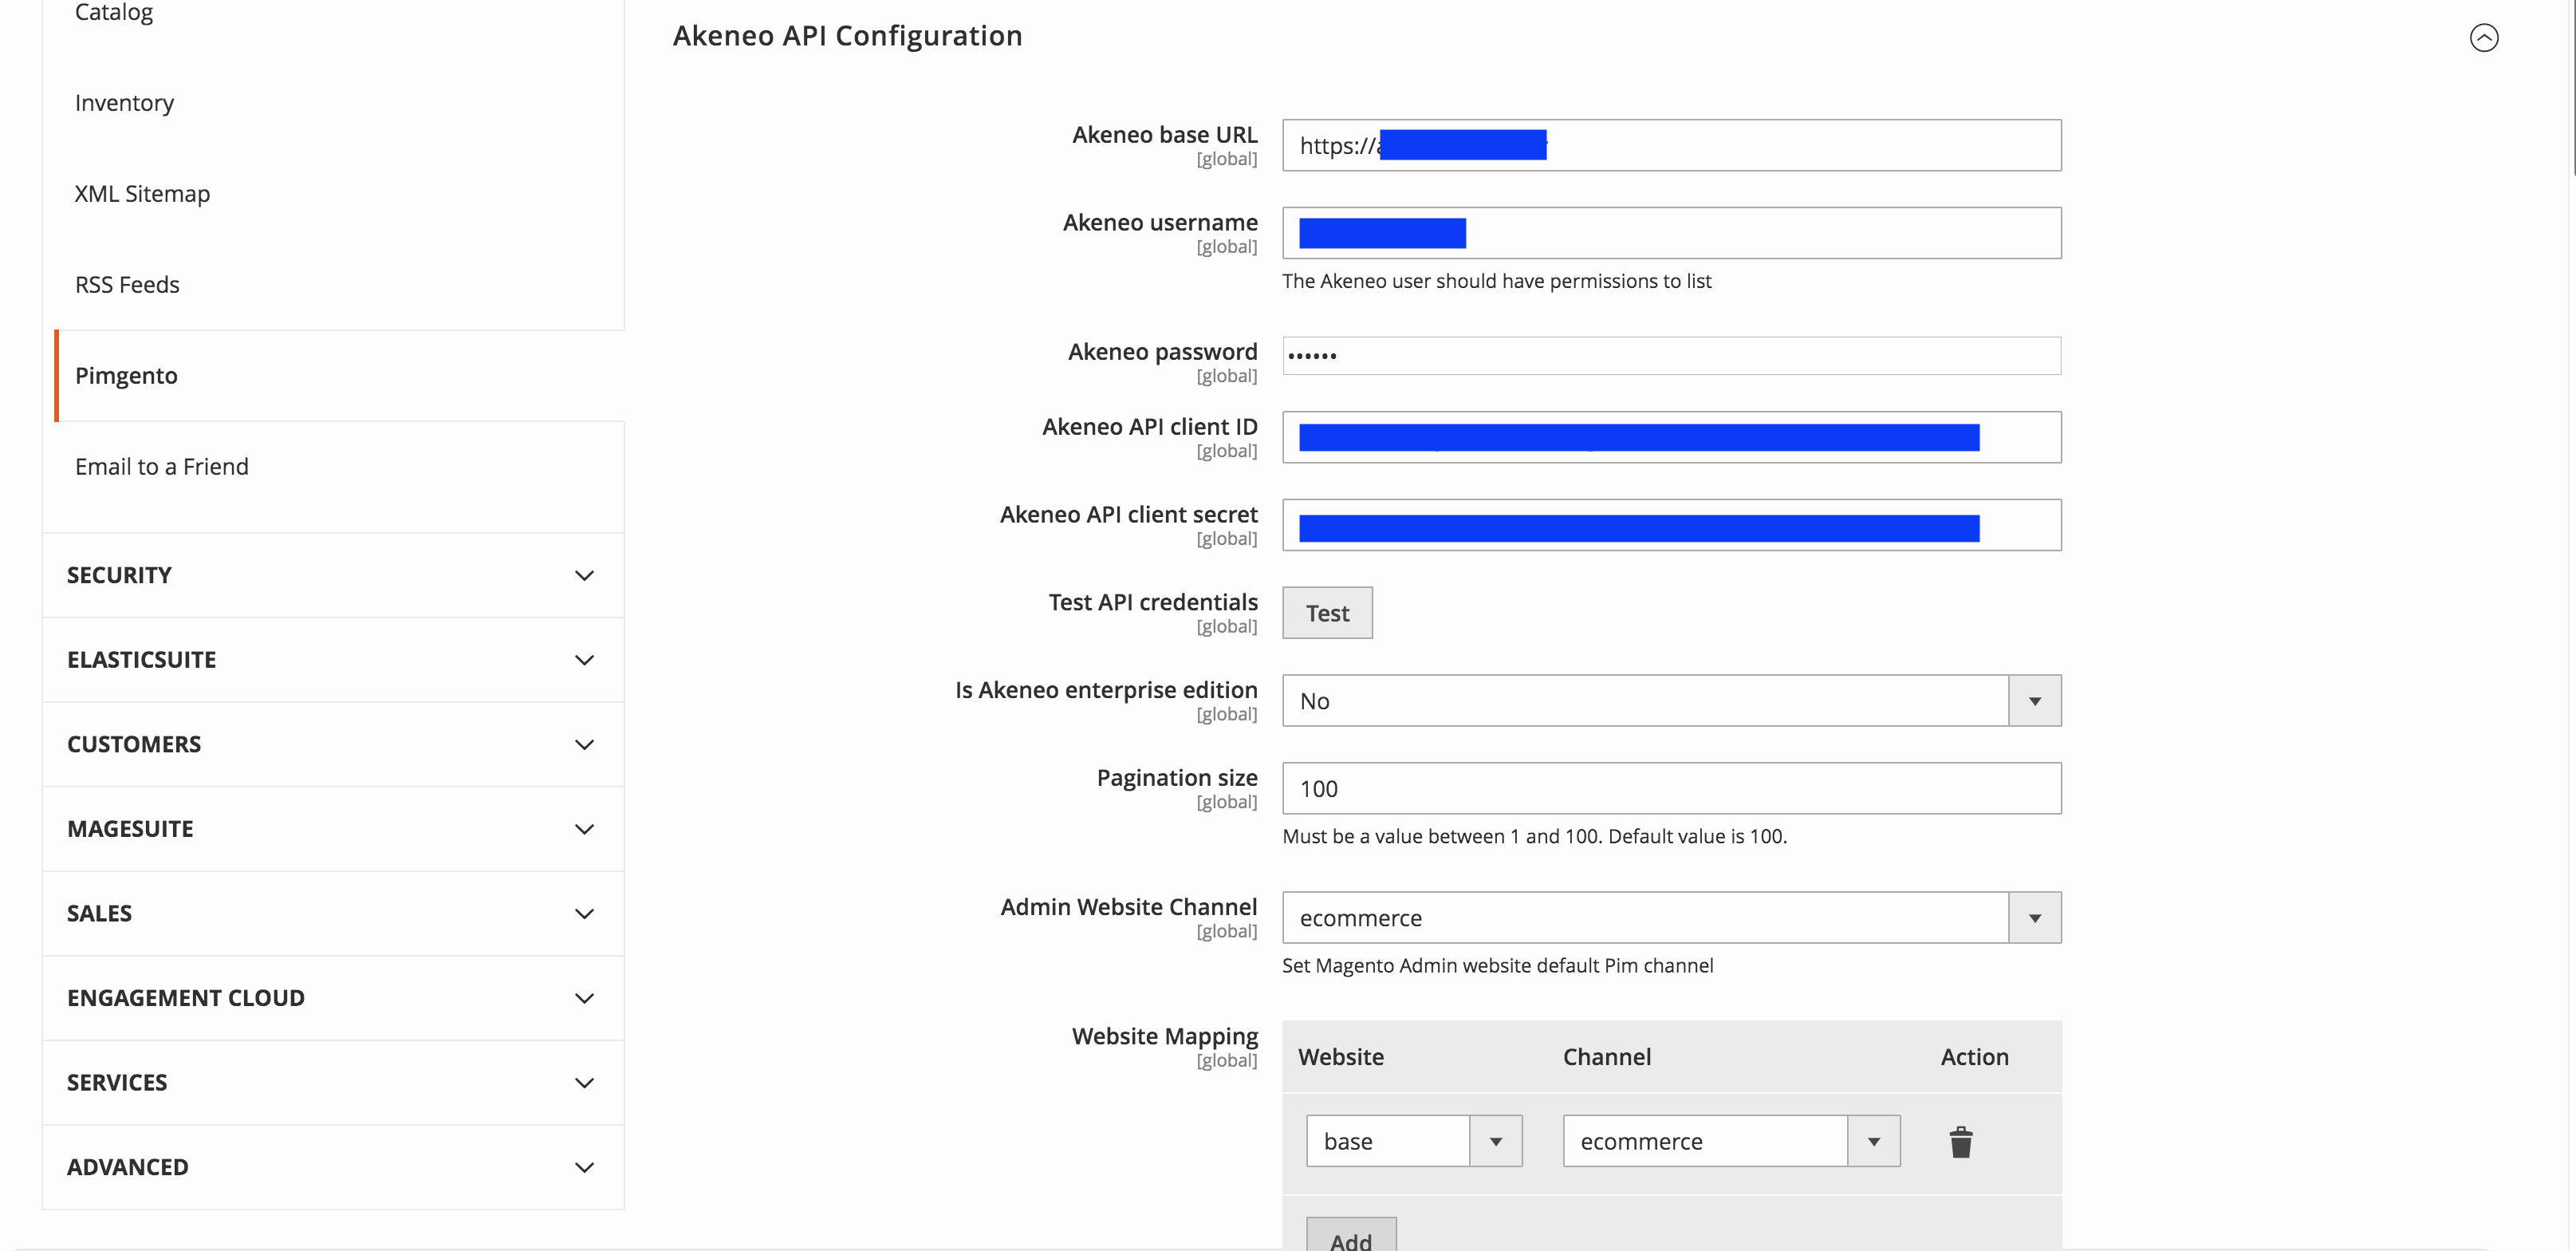
In order to confirm that the module has been correctly installed, you must go to Store > Configuration > Catalog > import. This is where the configurations (API Keys, attributes info, ...) will be filled in order to establish connection to the Akeneo server.
You must configure the API fields with the API keys created under akeneo previously. Then test it (i.e Test button) to verify that an successful connection can be established. Akeneo channels, categories, families should be automatically imported under corresponding fields in magento. This will allow you to match channels and others properties between magento and the akeneo server. In our current example, there is only one e-commerce website/store view on the magento side, hence the synchronization will be linked to it (base).
Configuration Api
Next we'll need to configure the products' basic filters. This step is pretty straightforward. No need to go through the details here.
Instead, let's dive into the attributes matching/mapping between the two servers. By default the module will try and manage this by itself by mapping the akeneo field name with the magento attribute code names. Unfortunately, if the attribute does not match any attribute code name, it will create a new attribute with the name provided in akeneo.
This can, unfortunately, lead to the existence on the magento side of two attributes having the same function, but just different codes, hence the need for a mapping.
Mapping of product attributes

In the above image, there's a mapping between name and description attributes. As mentioned above, these two mappings are useless, because these two attributes have the same code on both sides. Therefore, we could've discarded those mappings, they would've been done automatically.
Conversely, the mapping between meta_description and short_description here is mandatory. The value of the meta_description on the akeneo side will be copied into the short_description field of Magento. Otherwise, a meta_description attribute would've been created under magento in addition to short_description.
In conclusion, it is crucial to pay attention to code when creating attributes on both systems. This will limit the number of mapping and even do without it in some cases.
The last section of the configurations concerns image imports. This is also done through the mapping system.
Mapping of Image attributes
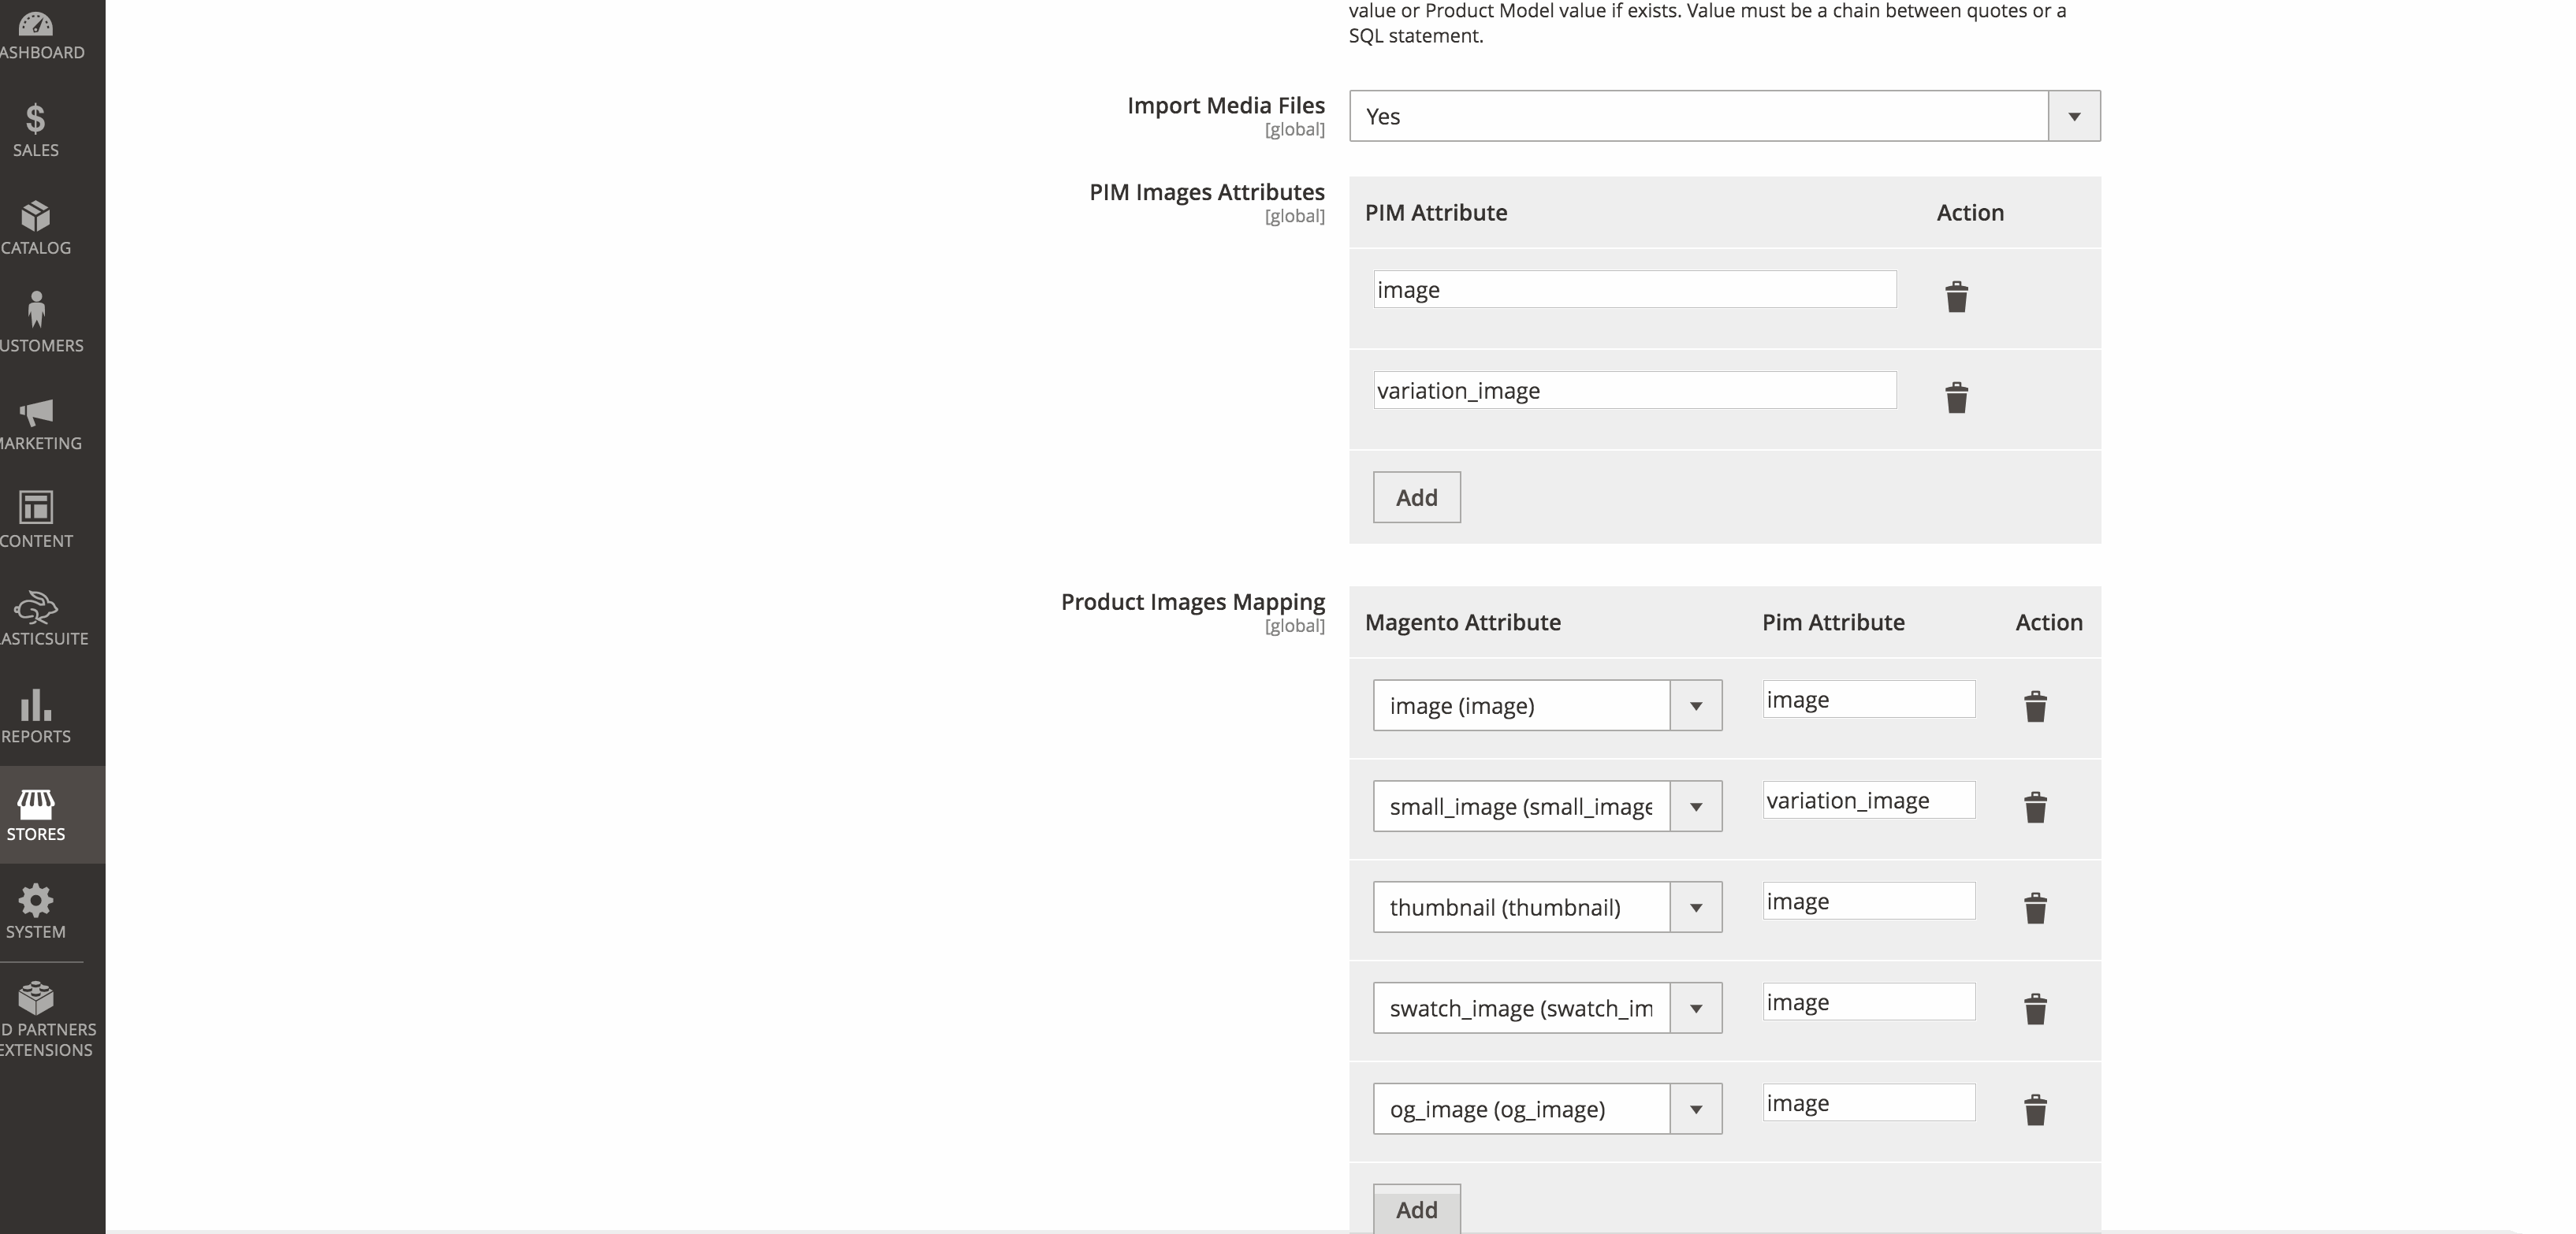
In the sample above, we've mapped most of the magento image attributes with the akeneo image one. Except for the small_image witch will match the variation_image filed mainly involved when the product is a configurable. The variations matching child products preview. Now that bulk of the configuration is done we can now trigger the import / synchronization.
3- Run the import
To start importing products to magento2, you have to go to System > Pimgento Api > Import (System > Pimgento Api > Import) and start all types of import one by one. Be careful to perform the imports in order, at least the first time (Category> Family > Attribute > option etc...).
Importing products into magento
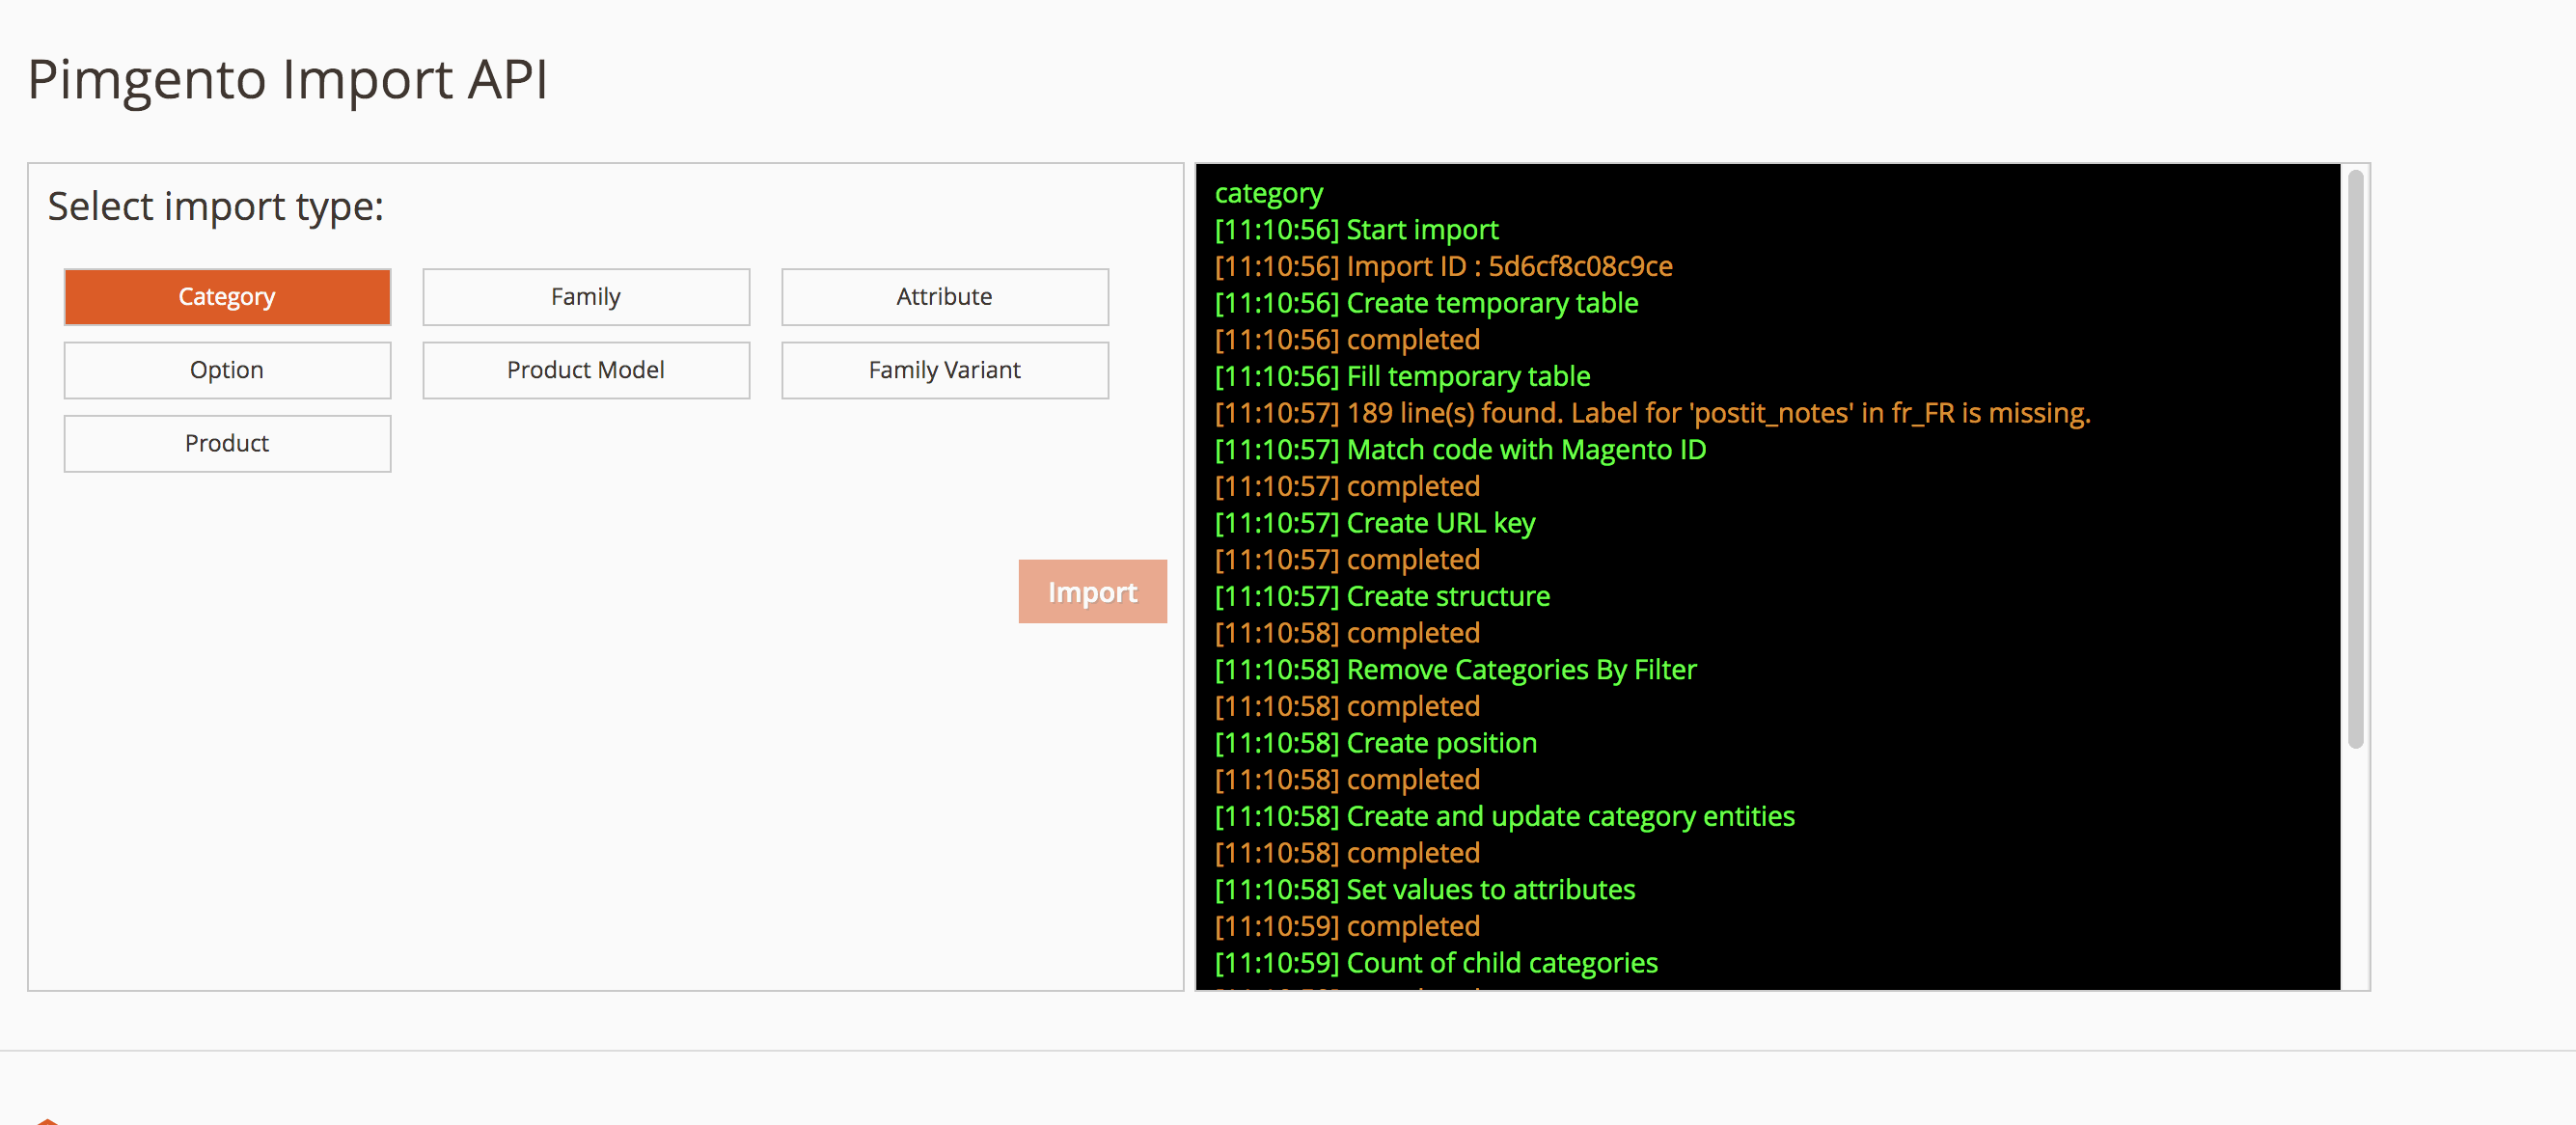
That's it, the products and their information will be imported into magento. Go to catalog > products to apply the latest configurations (stock management, etc.). The module offers the possibility of importing by command line. You will thus be able to set up crons which will allow you to make periodic imports in order to refresh the data or enlarge your catalog.
Find here a video tutorial in which we'll take you step by step through the configuration and the import process.